This article is sponsored by Fauna. If you are interested in producing similar content, apply to Write with Fauna.
Serverless and GraphQL have become pretty prolific buzzwords in the backend space. They each serve (heh) fairly different needs; the former takes the infrastructure management out of the backend, while the latter handles the efficiency and documentation pieces.
So, how do these approaches compliment each other? Let’s explore:
- 🤷 why you’d try serverless and GraphQL
- 🤝 the intersection of needs they both address
- 🔨 building a GraphQL backend using Netlify serverless
- 🗄 connecting to a persistent database using Fauna
- 🚀 deploying a live static website using Astro
Key terms
Before diving in, let’s define some import terms we’ll explore throughout the walkthrough.
- Serverless - a method of deploying backend logic to isolated functions executed and managed on a pay-as-you-go model
- GraphQL - a protocol for requesting information via HTTP, comparable to REST
- Jamstack - building web apps with a decoupled architecture. Your website’s frontend handles its own routing and view logic (often as an SPA), and sends requests to APIs as-needed.
Why serverless?
Have you seen those pay-as-you-play games gaining traction over the past few years? Let’s take Fortnite as an example. It’s 100% free to download and play for life, with optional paid extras for enthusiasts that want to get more from the game. This is perfect for people planning an impromptu game night for instance. If your buddy doesn’t have the game installed, no sweat! Just download the launcher and you’re battle royale-ing in no time.
This is a pretty good analogy for serverless in my opinion. Instead of building, deploying, and managing a routed server of your own (like a traditional video game charging $X up-front), you’re free to start with a single serverside function that someone else maintains. No need to pay for a complete Linux server instance yourself. Instead, write a single function in a (supported) programming language that receives a user request, computes the response necessary, and deploys to an existing server infrastructure. For here, you’re simply charged by the number of requests each functions fulfills. Free to enter, pay at scale.
This is perfect for “game night,” when your team needs to rapidly prototype a new project and get it deployed both quickly and cheaply. It should also save your team from managing the infrastructure surrounding each of those one-off serverless functions you write. Sure, you’ll be at the whim of AWS, Azure, Google Cloud, and more, but that might be more reliable than a personal IT department.
Why GraphQL?
To best understand GraphQL, let’s start with a food-based analogy for REST. I personally think of REST like ordering from an upscale, sit-down restaurant. Hungry for the steak dinner? Make a request to your server (heh, see what I did there) and get back a gourmet response 🥩
GET /kitchen/steak-dinner

> 200
> {
	steak: {
		cooked: 'medium-rare',
		size: 'xl',
	},
	spinachSalad: {
		prepared: 'steamed',
		toppings: ['tomato', 'pepper'],
	},
	chimichurri: {
		numGarlicCloves: 2,
		cupsParsley: 1.5,
	},
}
This response is hand-tailored by the chef for the perfect meal. Still, some people might not need all these bells and whistles. What if you don’t need the chimichurri sauce? Or you aren’t hungry for spinach salad? Or you don’t care how the steak is cooked? If you’re at an upscale restaurant where the chef always knows best... good luck changing that prebuilt plate.
How GraphQL turns menus into buffets
GraphQL turns this experience into a buffet model. Instead of a single option for everyone, GraphQL gives you, the user, the power to choose what you want.
Say we want that steak from earlier with no extra sides, and we don’t care how it’s cooked. We can pass these options on the request body like so:
POST /kitchen
body: {
	steak {
		size
	}
}
And kitchen can take this request back to the /kitchen, responding with your tailor-made meal:
> 200
> {
		steak: {
			size: 'xl'
		}
}
There’s a few important distinctions to make from our REST example:
- You’re now making a POST request instead of a GET. This is because you now have an opinion on what gets served. To “post” that request to the kitchen, you need to pass a body with your request.
- You post generically to the
/kitchen, instead of requesting a specific item like/kitchen/steak-dinner. This stems from the inverse of control we discussed in #1. In GraphQL, all requests are passed to a single handler (the kitchen) that receives and “resolves” incoming requests.
This approach is similar to a buffet. There’s one row of options available for you to inspect, and you’re free to choose the exact options you prefer. GraphQL even offers a “playground” to explore all available options from a given API. Like a buffet, you’re free to browse this self-documented schema of options to help craft a well-formatted request.
To summarize these benefits:
- GraphQL brings power back to the client. Instead of requesting needlessly large payloads from prebuilt REST endpoints, you can choose the exact information a given frontend view needs.
- GraphQL is self-documenting. Like a buffet, you can browse your API’s schema so there aren’t any surprises on that response body. This even helps with type generation in your codebase when you choose TypeScript 👀
Why serverless + GraphQL?
We’ve discussed the selling point for each of these. So what makes the combination of both so special?
Well, there’s a cross-section of needs that each of these help to address: teams want to ship experiences fast without asking questions. I personally identify with this as a mostly frontend developer. I don’t want to host, document, and maintain a server of my own; I just want to build efficient frontends with pits of success to save me as I scale. Here’s how serverless and GraphQL can help your team get there:
- By hosting GQL resolvers on serverless, you’re free to start for free and scale cheaply. Platforms like Netlify and Vercel also offer incredible developer experience to deploy these functions alongside your existing frontends (if you build using web tech).
- With a GQL API in place, you’re given a self-documenting “buffet” endpoint to hand-pick the right data for views in your application. This saves you from managing separate routes for each REST endpoint, and stitching together documentation as your backend scales.
Both of these offer a bias towards frontend-leaning teams planning to work fast.
When is serverless + GraphQL a bad choice?
To be honest, there isn’t a strong reason this combination in particular would be worrisome. It truthfully comes down to flaws with each technology in isolation.
Flaws with serverless
Serverless may be a poor choice for larger teams that plan to manage their own infrastructure. At scale, it might be preferable (and even cheaper) to purchase an AWS box to host your application and manage that server yourself.
There’s also the “cold start problem” to consider when using serverless. Since each function is automatically spun up and spun down on request, some requests may be slower as your hosting provider manages your function’s lifecycle.
Flaws with GraphQL
GraphQL may be a poor choice for simpler APIs, or for teams completely new to the technology. Now don’t get me wrong; GraphQL is preferable from the frontend layer most of the time due to its granular control and self-documentation. The real struggle emerges when implementing the backend behind this magical request buffet.
If you like batteries-included options, popular database services like Fauna and content management services (CMSs) like Contentful each generate GraphQL backend automatically. But when you’re implementing these resolvers yourself, managing a well-crafted API on a single endpoint can get complex. I recommend exploring Apollo’s getting started guide to decide whether this learning curve is right for your team.
Let’s build a simple app with GraphQL, Netlify serverless, Astro, and FaunaDB
It’s best to get our hands dirty discussing new tools. As an example, let’s build a small Jamstack website to display photos of far-out galaxies, courtesy of the NASA API 🌌
Here’s a brief overview of the tech we’re using:
- Netlify to spin up and host our serverless backend
- Apollo to generate a small GraphQL endpoint
- Fauna to persist our galaxies in a database
- Astro to build a static site that surfaces this information
Clone the starter code on your machine
Before jumping into the code snippets, I recommend cloning the “getting started” branch on this repository. It’ll offer a nice base for our frontend application, and set up some config files for linting and environment variables.
Overview of the project
Let’s break down our starter project’s structure:
📂 netlify/functions/
nasa.mjs # our serverless endpoint
📂 utils/
getFaunaClient.js # helper for our Fauna DB connection
mockGalaxies.js # static dummy data to get started
seed.js # small script to throw this dummy data on the DB
📂 www/
📂 src/
📂 layouts/ # template shared across our website
📂 pages/ # individual routes on our website
📂 styles/ # styles for space aesthetic 👩🚀
.env.development # env variable to store our API route
package.json # all our CLI scripts and dependencies
# other miscellaneous config files...
Most of our frontend has been pre-built so we can focus on GraphQL + serverless. We’ll jump into netlify/functions and those utils/ to get to the action!
Spin up your function locally with the Netlify CLI
You’ll notice some starter code under netlify/functions/nasa.mjs:
export const handler = async () => {
  return {
    statusCode: 200,
    body: 'hello galaxy!',
  }
}
As you might imagine, we should get the response “hello galaxy!” whenever we call this endpoint.
Let’s try querying this function locally. First, ensure you have node + npm installed on your machine. Now you can install the Netlify CLI globally like so:
npm install netlify-cli -g
netlify --version
If you get a --version output in your terminal, you should be good to go! Note: you might need to close and restart your terminal if you run into issues with this check.
You’ll also need a Netlify account for simpler debugging and deployment in a moment. Go ahead and make a free Netlify account here.
Next, authenticate from your terminal and follow the prompts:
netlify login
If all goes well, you’re ready to spin up a local Netlify server:
npm install # install project dependencies first
npm run ntl:dev
☝️ If you check the package.json at the base of this project, you’ll see that ntl:dev maps to the netlify dev command. You’ll also see a whole host of scripts we’ll try in the coming sections!
You should see a console output like this:
◈ Netlify Dev ◈
◈ No app server detected. Using simple static server
◈ Running static server from "fauna-serverless-graphql/netlify"
◈ Loaded function nasa.
◈ Functions server is listening on XXXXX

◈ Static server listening to XXXX

   ┌─────────────────────────────────────────────────┐
   │                                                 │
   │   ◈ Server now ready on http://localhost:8888   │
   │                                                 │
   └─────────────────────────────────────────────────┘
All your serverless functions will be visible from the .netlify/functions route. Assuming your console says http://localhost:8888, you should find a nice “hello galaxy!” message a http://localhost:8888/.netlify/functions/nasa.
Write a simple GraphQL resolver using Apollo lambda
Now that you’re up-and-running, let’s jump into some GraphQL!
You may have noticed a static array of info under utils/mockGalaxies.js:
module.exports = [{
  title: 'Galaxy Centaurus A',
  description: 'This image of the active galaxy Centaurus A was taken by NASA Galaxy Evolution Explorer on June 7, 2003. The galaxy is located 30 million light-years from Earth and is seen edge on, with a prominent dust lane across the major axis.',
  credits: 'NASA/JPL/Caltech',
  imageUrl: 'https://images-assets.nasa.gov/image/PIA04624/PIA04624~orig.jpg',
}, ...]
Let’s use this as our “database” for now. Right off the bat, you’ll notice a common structure for each entry: title, description, credits, and imageUrl. We can consider this our GraphQL schema.
We’ll define this schema using the gql helper provided by apollo-server-lambda:
// netlify/functions/nasa.mjs
import { gql } from 'apollo-server-lambda'

const typeDefs = gql`
type Galaxy {
  title: String,
  description: String,
  credits: String,
  imageUrl: String
}
`
export const handler = async () => ...
This defines the structure of information that we’ll return in a moment.
Next, let’s define the “resolvers” for this endpoint. We just need a single resolver for this example: galaxies. This returns our array of Galaxy entries.
// netlify/functions/nasa.mjs
...
const typeDefs = gql`
type Query {
  galaxies: [Galaxy!]!
}
type Galaxy {
  title: String,
  description: String,
  credits: String,
  imageUrl: String
}
`
...
Notice that we place this galaxies resolver on the Query type. We’ll reference this type when defining the galaxies resolver.
Now that we have this schema defined, let’s start returning some data! We’ll use the ApolloServer dependency here. This helps us:
- Define what each resolver returns using JavaScript functions
- Match this up with our
typeDefs - Generate a request handler to use for our
export const handler. This is modeled to work with AWS Lambda, which is the backbone for Netlify serverless.
We’ll write a resolver to return our mockGalaxies:
// netlify/functions/nasa.mjs
import { ApolloServer, gql } from 'apollo-server-lambda'
import mockGalaxies from '../../utils/mockGalaxies'

const typeDefs = gql`
type Galaxy {
  title: String,
  description: String,
  credits: String,
  imageUrl: String
}
type Query {
  galaxies: [Galaxy!]!
}
`

const resolvers = {
  Query: {
    galaxies() {
      return mockGalaxies
    }
  }
}

const server = new ApolloServer({ typeDefs, resolvers })

export const handler = server.createHandler()
Try visiting http://localhost:8888/.netlify/functions/nasa again. Now, you should see an entire playground interface to explore 👀
If you click on the “docs” tab, you’ll see that galaxies resolver that we just defined. Clicking through reveals some information about the return value as well.
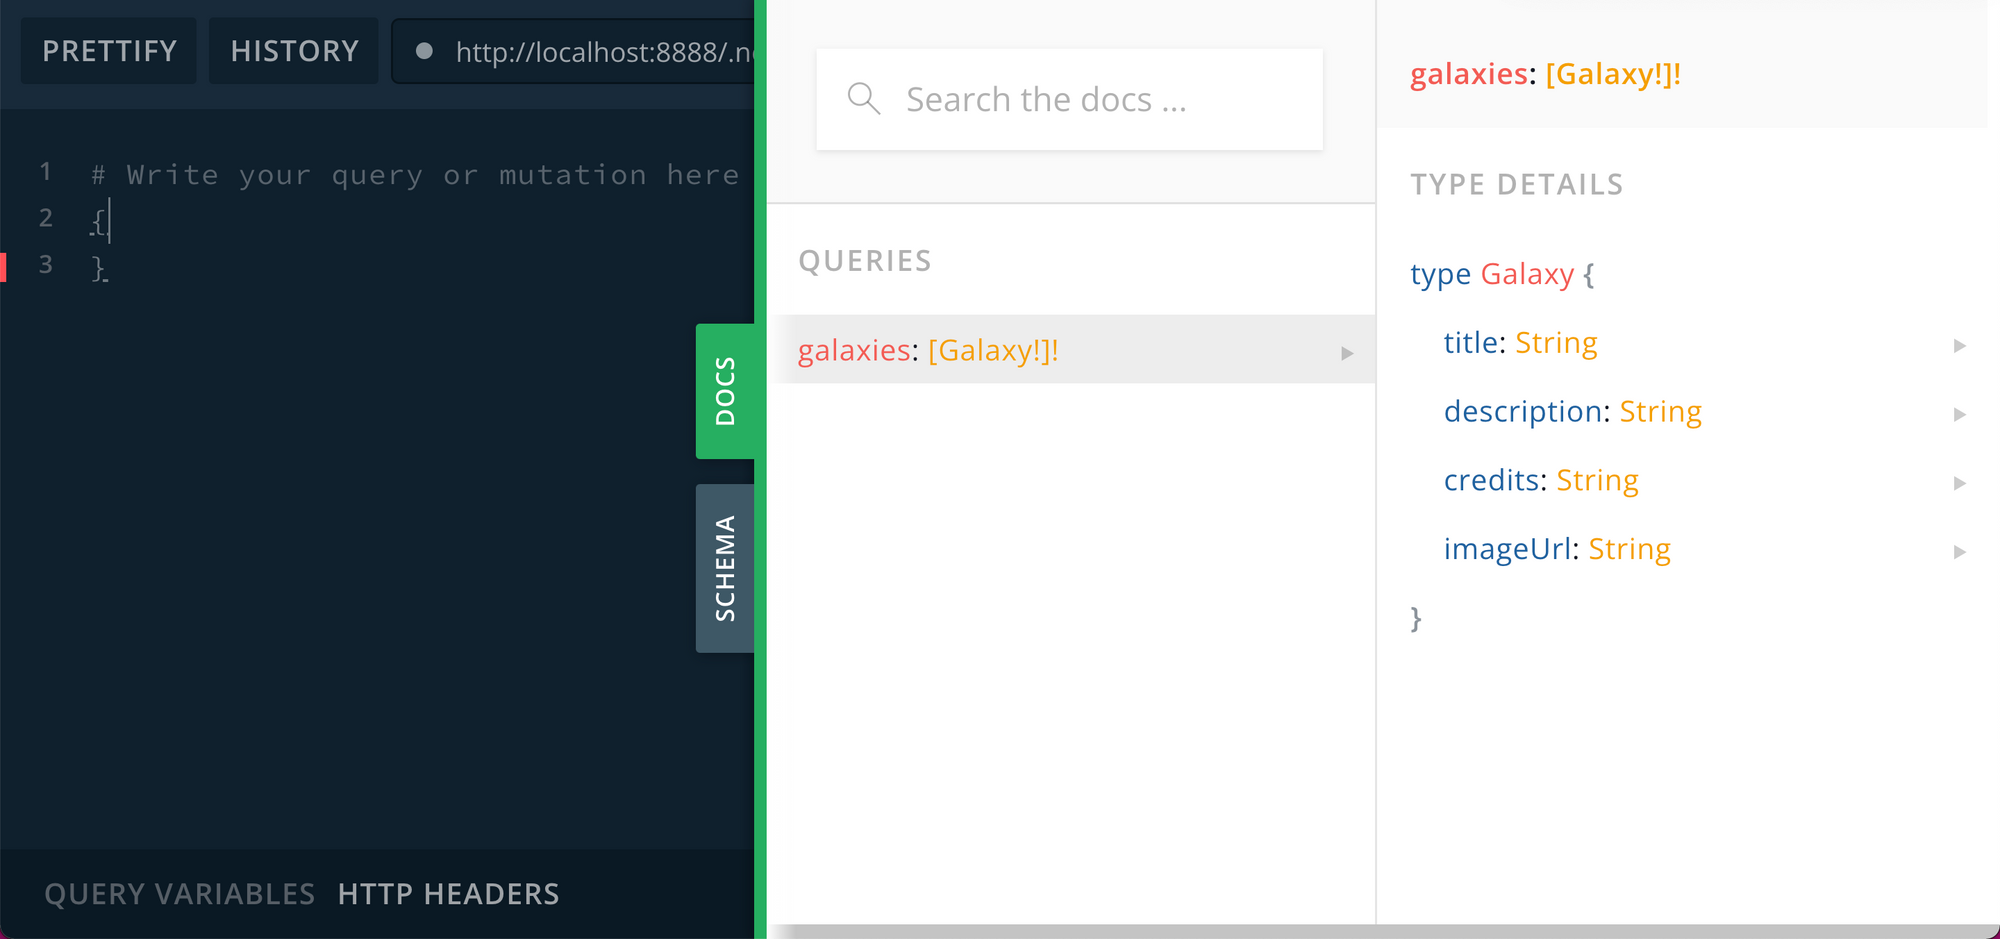
This is automatically returned for all GET requests to your GraphQL endpoint. Let’s try crafting a query in that lefthand menu to get our feet wet. I invite you to type this by hand instead of copy / pasting! You’ll be greeted by some handy autocomplete 🙃
For instance, let’s retrieve just the title and description fields from that array:
{
	galaxies {
		title
		description
	}
}
Hitting the “run” button should reveal that subset of info from our mockGalaxies.
Query this serverless endpoint from your Astro frontend
So we’ve generated a playground to try out new queries. How can we use this inside a real-world application?
Head over to www/src/pages/index.astro in our example project. You should see the following TODO at the top of the file:
let galaxies = []
// TODO: fetch galaxy summary info
Don’t worry too much about the fancy templating being used at the bottom of the file. Just know that anything inside those --- blocks will be plain ole JavaScript that’s run whenever we build our site. You can always explore Astro’s getting started guide to go further 🚀
Let’s try generating an overview page of all the galaxies in our “database.” That view should look something like this once it’s working:
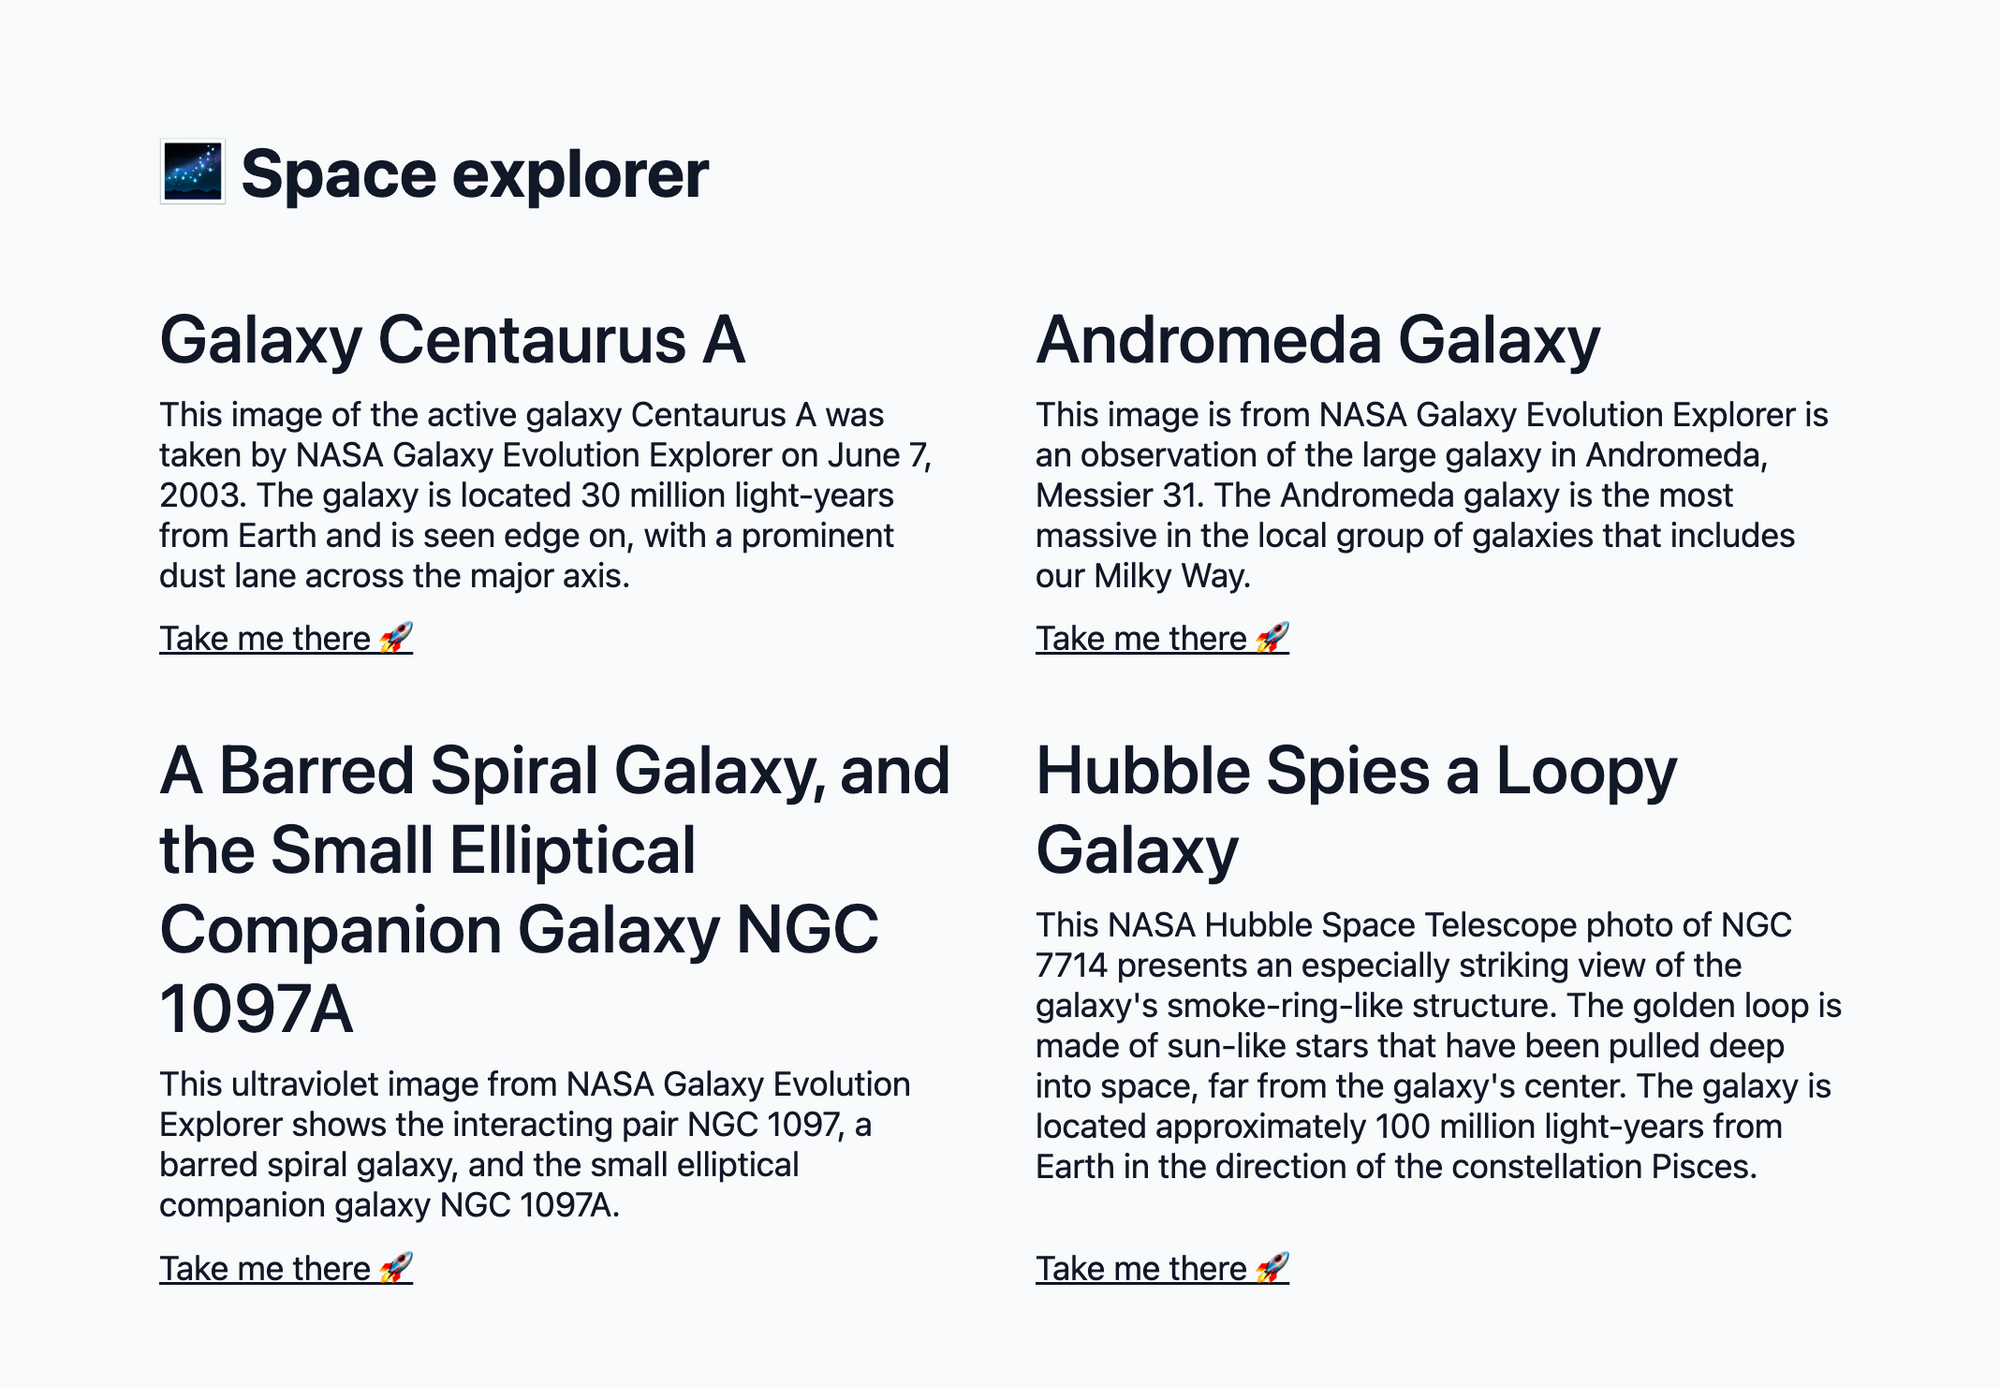
☝️ You’ll notice we only need each galaxy’s title and description. Let’s write a GraphQL query to reflect this.
---
// www/src/pages/index.astro
import Layout from '../layouts/base.astro'
import slugify from 'slugify'

let galaxies = []
const { data, error } = await fetch(`${import.meta.env.API_URL}`, {
	method: 'POST',
	body: JSON.stringify({
		query: `{
			galaxies {
				title
				description
			}
		}`
	}),
}).then(res => res.json())

galaxies = data.galaxies
...
To summarize what’s going on:
- We make a
fetchrequest to our serverless function using the web-standard fetch API - We use
import.meta.env.API_URLas the URL to request from. This is referencing an environment variable in our application defined underwww/.env-development. Tweak this to match wherever you’re running that Netlify development server from. - We use
POSTas our method here. Remember, since we have a preference for what data we want, we need to “post” a body to our server. - We write our query as a string. Feel free to copy / paste the example request we wrote in the playground, placed under the
querykey as shown. - We convert the response to JSON using
res.json() - We assign the response to our
galaxiesvariable. Feel free to add to add anytry / catchboundaries or error handling you want based on thaterrorobject (example here).
Assuming your Netlify server is still running from that npm run ntl:dev command, you’ll need to open a second terminal window to see this frontend in action. Create a new window and run the following:
npm run astro:dev
You should see an output like 06:23 PM [astro] Local: http://127.0.0.1:3000/. Clicking this link, you’ll find a nice summary of galaxies to explore 🚀
Generate routes for each galaxy
You may have hit this error trying to click any of those homepage links:
[getStaticPaths] route pattern matched, but no matching static path found. (/Galaxy-Centaurus-A)
That’s because, well, these routes don’t exist yet! Let’s generate unique pages for each galaxy to reveal more information. Head over to www/src/pages/[galaxy].astro. Here, you’ll find a helper to generate routes from API data like so:
export async function getStaticPaths() {
  // TODO: generate pages for each galaxy
  return []
}
If you come from NextJS, you’ll notice this is very similar to their static path generator. This function should return an array of website pages for Astro to generate, each displaying the whole suite of Galaxy info: title, description, credits, and imageUrl.
We can write a similar fetch query to that earlier example, this time requesting all 4 keys:
---
import Layout from '../layouts/base.astro'
import slugify from 'slugify'

export async function getStaticPaths() {
	// same format as before, now with a new query body
  const { data, error } = await fetch(`${import.meta.env.API_URL}`, {
      method: 'POST',
      body: JSON.stringify({
        query: `{
          galaxies {
            title
            description
            imageUrl
            credits
          }
        }`
      }),
    }).then(res => res.json())

  return data.galaxies.map(galaxy => ({
      // params.galaxy -> the URL you can visit in your browser
      // ex. the galaxy with title "Andromeda Galaxy"
      // will be visible at http://127.0.0.1:3000/Andromeda-Galaxy
      params: { galaxy: slugify(galaxy.title) },
      // props -> all information available to our galaxy page
      // see the Astro.props being used below
      props: galaxy,
    }))
}

const { title, description, imageUrl, credits } = Astro.props
...
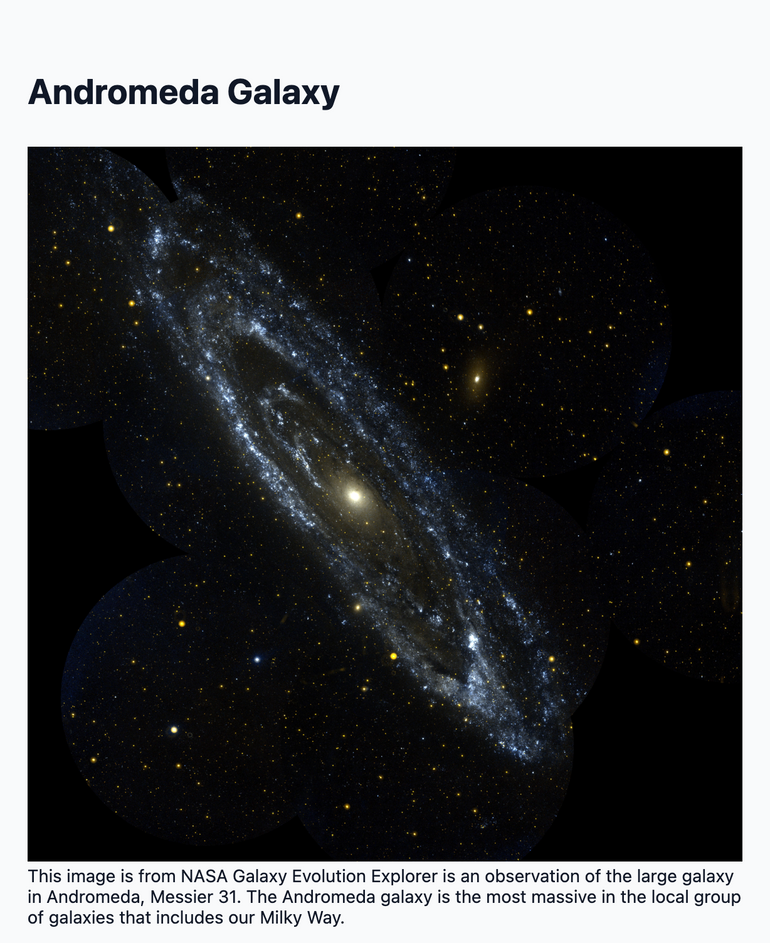
This should generate unique URLs for all of our galaxies, and grab each galaxy’s info for display using Astro.props. Now, clicking any of your homepage links should reveal a beautiful galaxy image like so:
Persist these galaxies in a database with Fauna
This is great for demo purposes, but you probably can’t store all your information in a static mockGalaxies file.
Let’s try throwing these galaxies in a Fauna database. To get the most up-to-date info, I recommend visiting Fauna’s prerequisite doc section to get started. This will walk you through setting up an account, generating your first database, and getting an API secret for connecting to that database. Don’t worry, I’ll wait 😁
...
Got that secret key? Great! Let’s store this in a .env file for our serverless function to use. Create a .env file at the base of the project with the following contents:
FAUNA_SECRET=secret-you-copied-from-fauna
Also take note of the region used to generate this new project. Our starter code assumes you’ll use a US region. If not, feel free to update the “domain” field under utils/getFaunaClient.js. See this documentation for properly setting the domain URL. Warning: If configured improperly, none of your queries will run 🚨
Load mockGalaxies into your database
Let’s “seed” this new database with our sample data. We’ve written a handy script under utils/seed.js to handle this. If you’re curious about Fauna’s fancy FQL query syntax, we recommend checking the FQL fundamentals guide.
You can run this script by executing:
node ./utils/seed.js
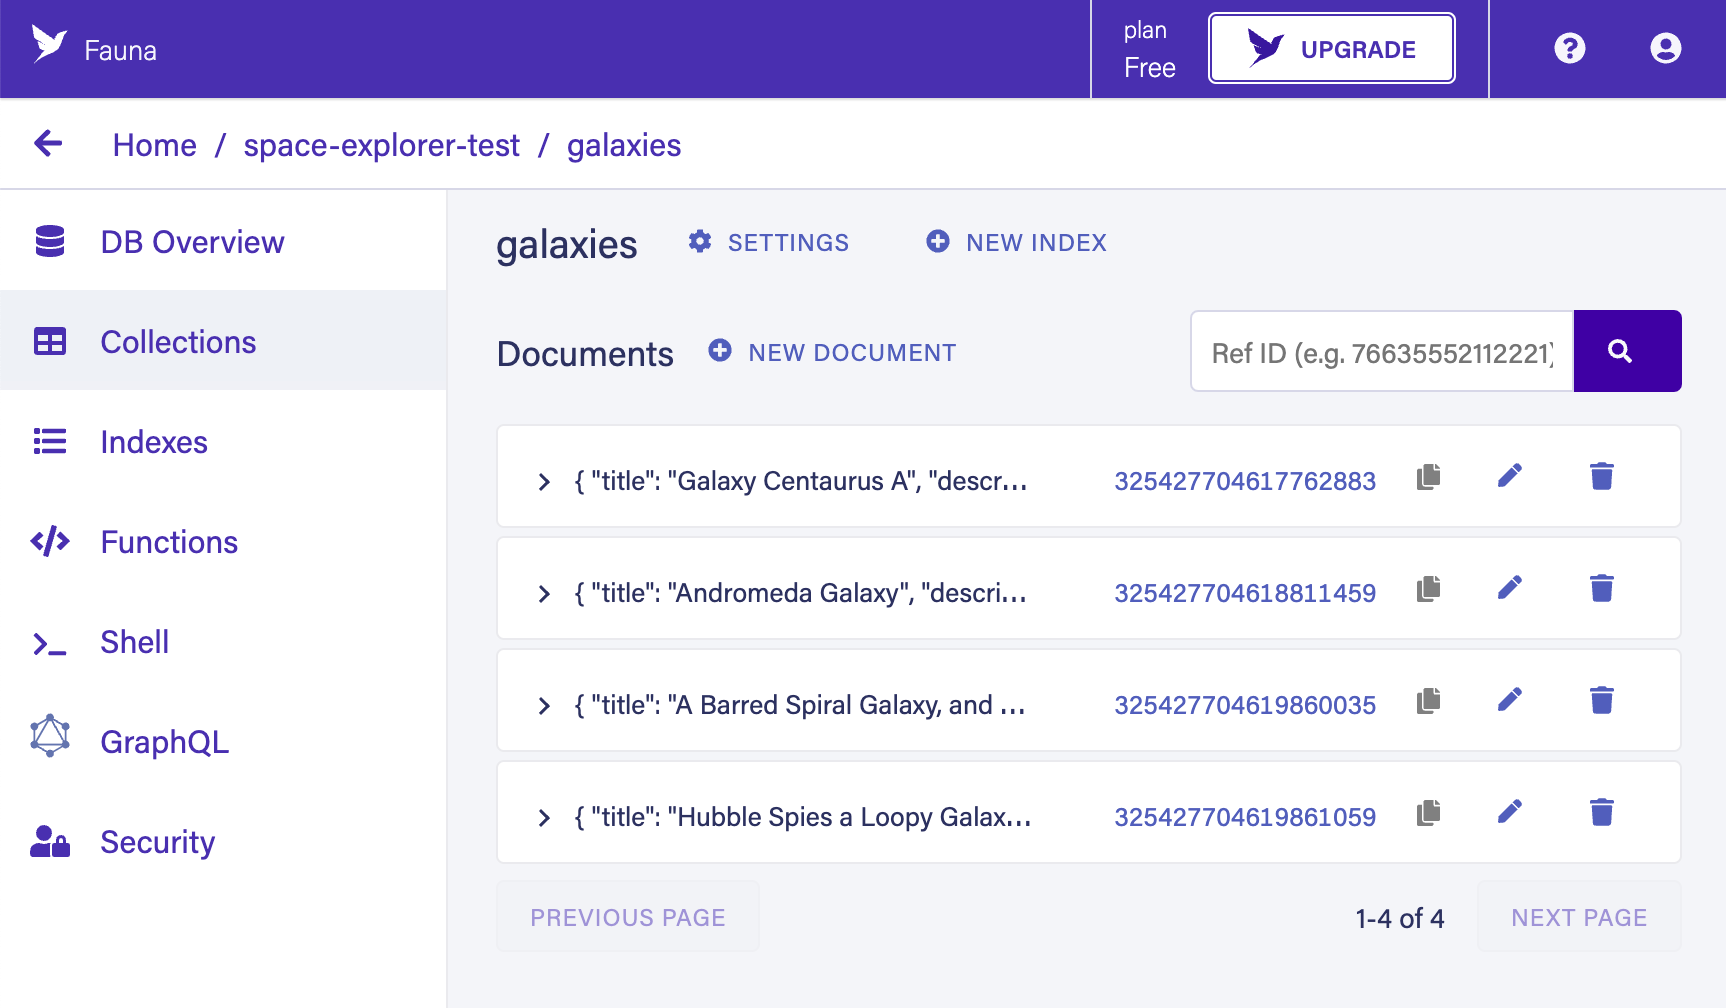
Once this is finished, you should see a new galaxies collection under the “collections” tab in your dashboard.fauna.com window.
Query this data from your GraphQL resolver
With this data in place, we’re ready to start querying from our GraphQL resolver! Start be establishing a connection with your Fauna server. We included a handy helper function for this under utils/getFaunaClient.js, but here’s the code for the sake of completeness:
const { Client } = require('faunadb')
// set up our fauna secret from that .env file
require('dotenv').config()

module.exports = function getFaunaClient() {
  return new Client({
    secret: process.env.FAUNA_SECRET,
		// whichever domain you (hopefully!) configured earlier
		// docs: https://docs.fauna.com/fauna/current/drivers/connections?lang=javascript#connection-options
    domain: "db.us.fauna.com",
  });
}
Then, call this helper from the top of our nasa.mjs function handler:
// netlify/functions/nasa.mjs
import { ApolloServer, gql } from 'apollo-server-lambda'
import { query as q } from 'faunadb'
import getFaunaClient from '../../utils/getFaunaClient'

const faunaClient = getFaunaClient()
...
Now, let’s query our galaxies collection from our galaxies GraphQL resolver. If you want to learn Fauna’s FQL language, I highly recommend trying the “shell” tab from dashboard.fauna.com first. You can use this for sandboxing queries before their implementation. I was personally quite new to FQL, so it was pretty helpful to try out the Document and Lambda helpers 🙃
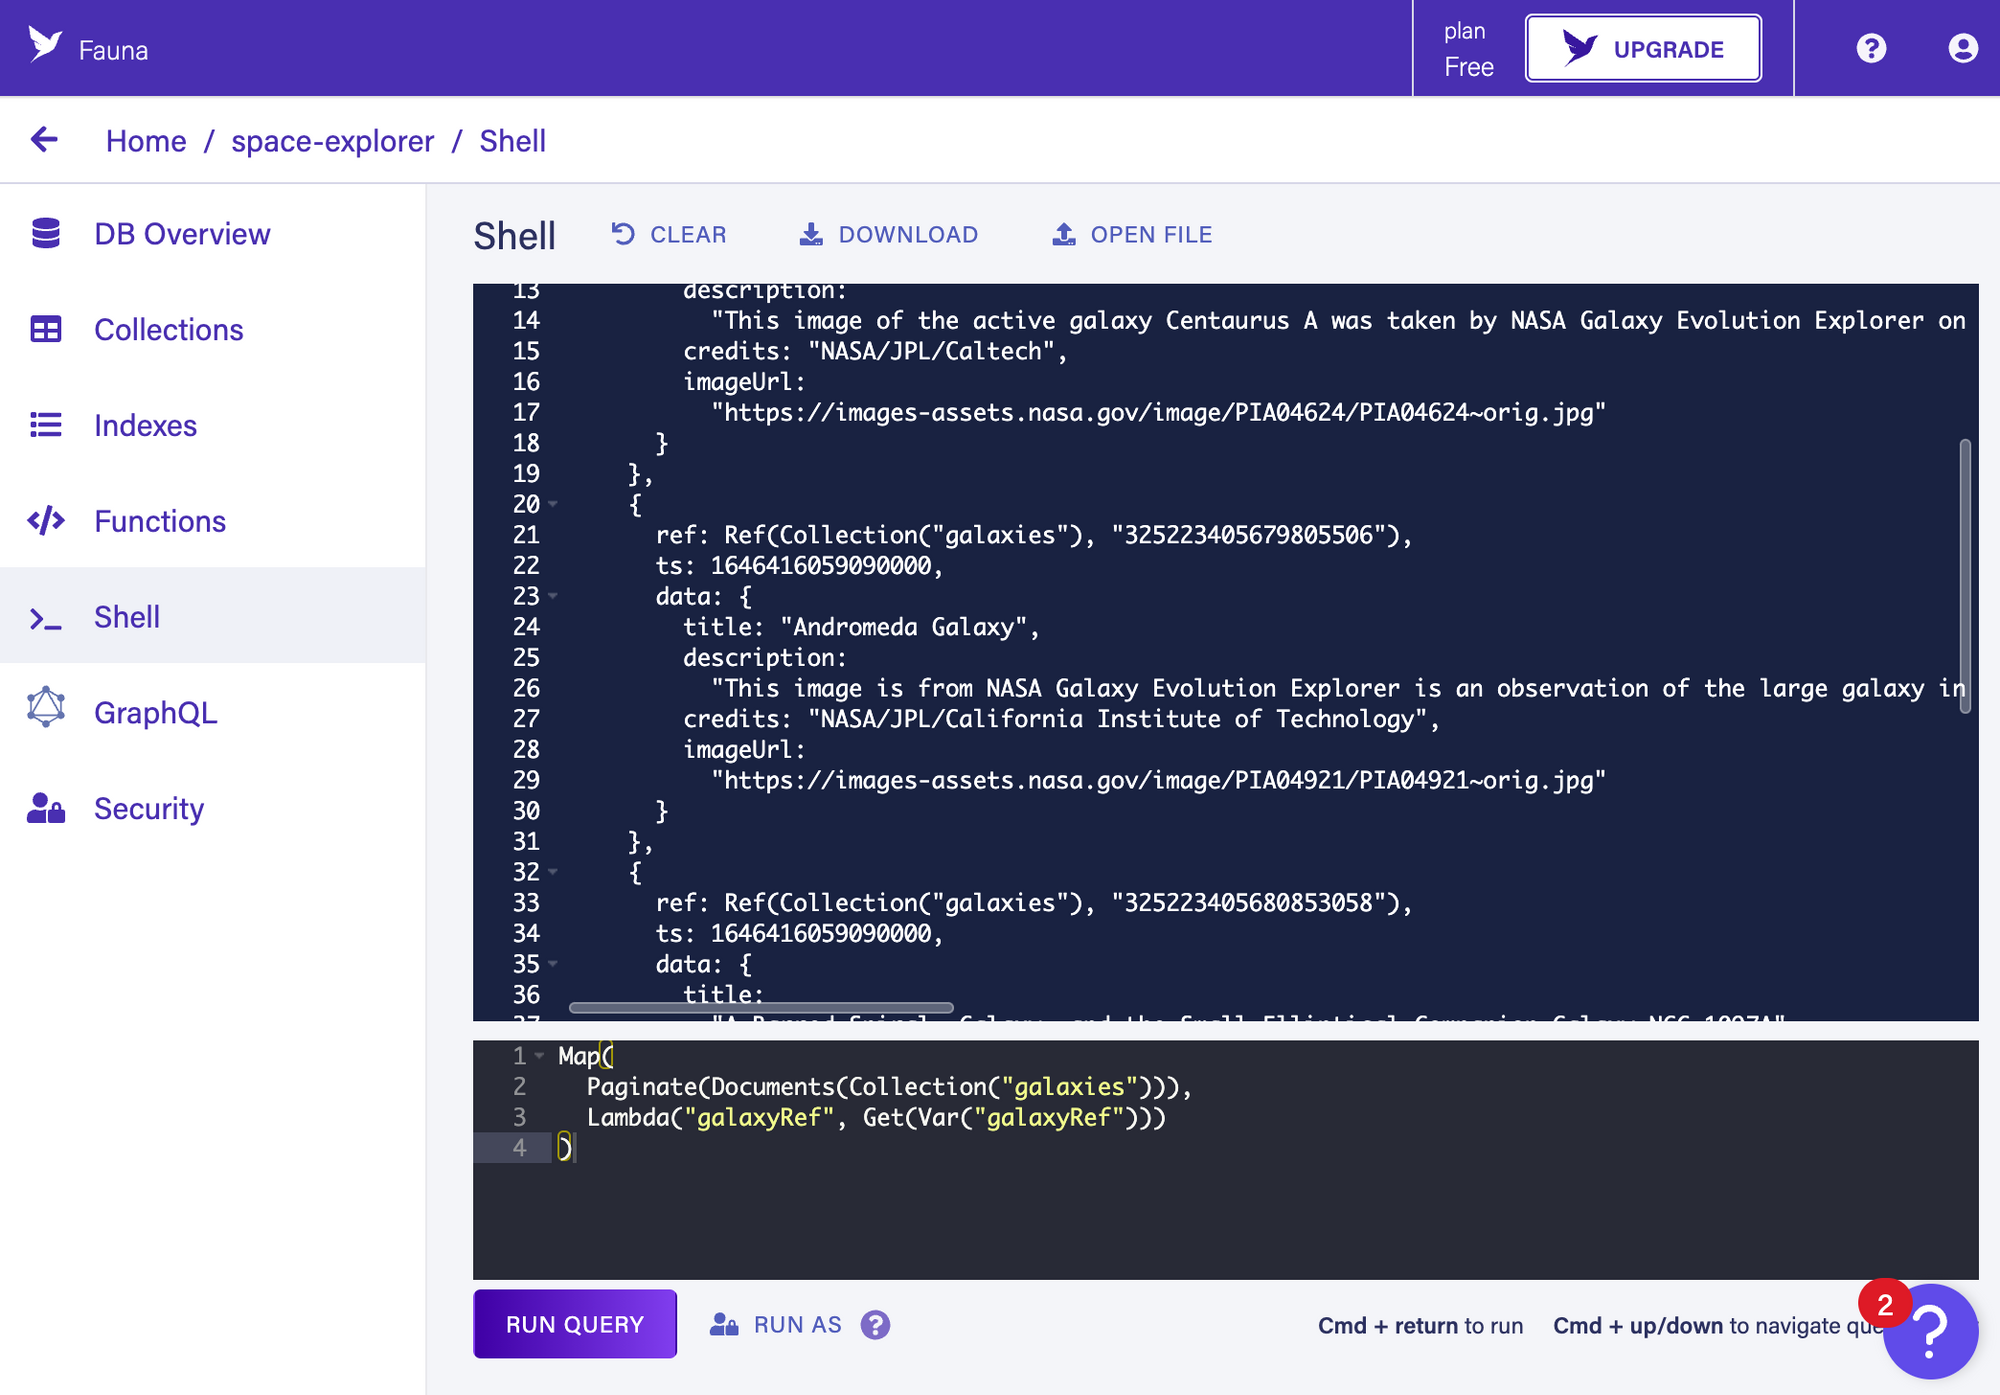
Sample output from the “shell.” Check Fauna’s FQL fundamentals to learn more about querying documents.
☝️ As you can see, this test query returned our galaxy data as expected. We can use Fauna’s JavaScript library to translate this into our demo app:
// netlify/functions/nasa.mjs
import { query as q } from 'faunadb'
...
const resolvers = {
  Query: {
    async galaxies() {
      const galaxiesRaw = await faunaClient.query(
        q.Map(
          q.Paginate(q.Documents(q.Collection("galaxies"))),
          q.Lambda("galaxyRef", q.Get(q.Var("galaxyRef")))
        )
      )
      try {
				// Fauna returns each object on a nested “data” key
				// Let’s flatten this
        return galaxiesRaw.data.map(galaxyRaw => galaxyRaw.data)
      } catch {
        console.error(`The fauna galaxies query returned malformed data: ${JSON.stringify(galaxiesRaw, null, 2)}`)
        return []
      }
    }
  }
}
If you check out our Astro dev server from earlier, we should see... exactly the same output 😁 But now we’re free to add more documents in the future, or even create a /upload route to submit new galaxies.
Now, your code is ready to ship! If you hit any rough patches along the way, or want to see everything in its final form...
Check our finished solution on GitHub →
Can you use Fauna’a GraphQL resolvers instead?
You might be aware that Fauna has a built-in GraphQL API you can query. This is a great option to consider as well! It’ll save you from writing these Apollo resolvers + serverless functions yourself, and it should ensure more complex queries stay efficient.
So why did we write these resolvers by hand? There’s a couple reasons:
- I’m not sure what database you plan to use. If you’re reading this article coming from a non-Fauna storage option, I want to show how you can build your own GraphQL + serverless flow using Apollo. Fauna’s GraphQL setup is a natural next step if you like what you see.
- It’s helpful to explore serverless hosting options. Fauna hosts the serverless GraphQL backend for you, which is extremely convenient for spinning up new projects. Still, I’d assume most projects with mid-to-high complexity need to manage their own infrastructure in some way. Whether your stitching together different microservices, or exploring edge computing for distribution, it’s best to understand your options before using the batteries-included option.
Deploy this serverless function for production use
Finally, let’s try deploying our serverless endpoint to a “live” server. We have a couple pre-written commands to try here:
npm run ntl:deploy→ Deploy to a URL of your choosingnpm run ntl:deploy-preview→ Deploy to a randomized test URL
I’d recommend trying the deploy-preview first. This will run netlify env:import .env to ensure FAUNA_SECRET is visible from your serverless function. You’ll see an output like this in your console if all goes well:
.---------------------------------------------------------.
|             Imported environment variables              |
|---------------------------------------------------------|
|     Key      |                  Value                   |
|--------------|------------------------------------------|
| FAUNA_SECRET | secret-you-copied-from-fauna             |
'---------------------------------------------------------'
Then, it will upload a live deploy preview under your Netlify account. You should be free to explore this preview by visiting random-url.netlify.app/.netlify/functions/nasa.
Deploy your frontend for production use
With this serverless function live, you’re ready to build your static website as well.
Remember that www/.env.development from earlier? This set our API_URL to reference our local Netlify instance. To configure your production builds, you’ll need a www/.env.production just alongside this:
API_URL=https://where-you-deployed-your-serverless-fn/.netlify/functions/nasa
Now, you’re ready to run either of the following scripts:
npm run astro:preview→ generate a local preview of your production buildnpm run astro:deploy→ deploy your website for production
Conclusion
I hope this walkthrough opened your mind on some new tooling! If there’s any takeaways you find from this article, I hope they’re along the lines of:
- GraphQL + serverless are a great pairing for frontend-leaning devs looking to ship quickly and cheaply
- You can absolutely deploy GraphQL to a serverless function, all with minimal effort thanks to packages like apollo-server-lambda
- Fauna’s built-in GraphQL endpoints are worth exploring for a batteries-included option to backend management
- Netlify is pretty helpful for hosting frontends and backends these days
- NASA’s public APIs are awesome for interstellar imagery 🪐
As always, there’s no “silver bullet” to building applications. So, keep sampling this renaissance of new tooling and find what sticks!
